
Have you ever finished a school assignment, only to realize that you also need to present it in front of your class? You may understand the topic perfectly, but turning your notes into a presentation can feel like a completely different task.
The good news is that you do not need to be a graphic designer or a computer expert to create a good PowerPoint presentation. With a few simple steps, you can organize your ideas, add pictures, choose a clean design, and prepare slides that are easy for your classmates and teacher to understand.
Whether you are preparing a science project, a history assignment, an English presentation, or a group project, this guide explains how to make a PowerPoint presentation for school from start to finish.
What Do You Need to Make a School PowerPoint Presentation?
Before creating your first slide, gather the basic materials for your project. This small preparation step can save you time later.
You will usually need:
- A computer or laptop, although a smartphone or tablet can also work.
- Microsoft PowerPoint or another presentation app.
- Your assignment topic and instructions from your teacher.
- Reliable information from textbooks, educational websites, or class notes.
- Relevant pictures, diagrams, or charts.
- A rough outline of the points you want to explain.
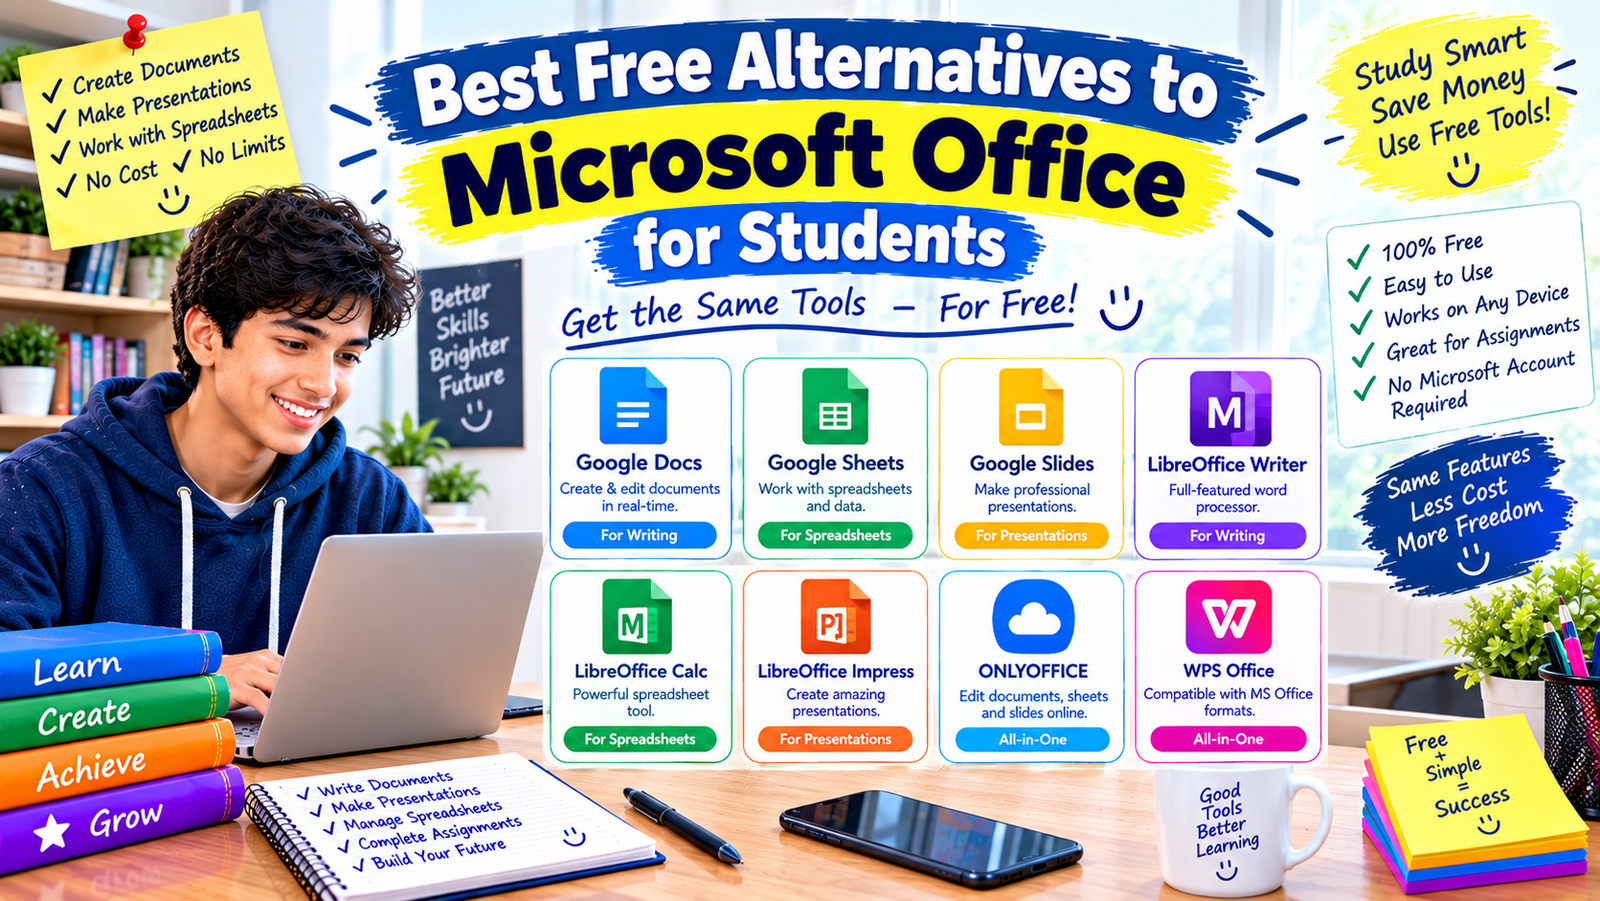
You do not need to buy expensive software just to make a school presentation. Several tools offer free options, including PowerPoint for the web, Google Slides, and Canva.
Step 1: Choose Your Topic and Plan Your Slides
The first step is to understand what your teacher wants you to present. Check the assignment instructions before opening PowerPoint.
For example, if your topic is “The Solar System,” you could organize your presentation like this:
- Title slide
- Introduction to the solar system
- The Sun and its importance
- The eight planets
- Earth’s position in the solar system
- Interesting facts about space
- Conclusion
- References
This outline gives your presentation a clear direction. It also helps prevent a common problem: spending too much time designing slides before deciding what information belongs on them.
Your presentation does not always need eight slides. A short classroom task might require only four or five, while a detailed project could need more. Follow your teacher’s instructions first.
Practical tip: Write down the main points of your topic in a notebook or document before creating slides. Once the information is organized, building the presentation becomes much easier.
Step 2: Open Microsoft PowerPoint
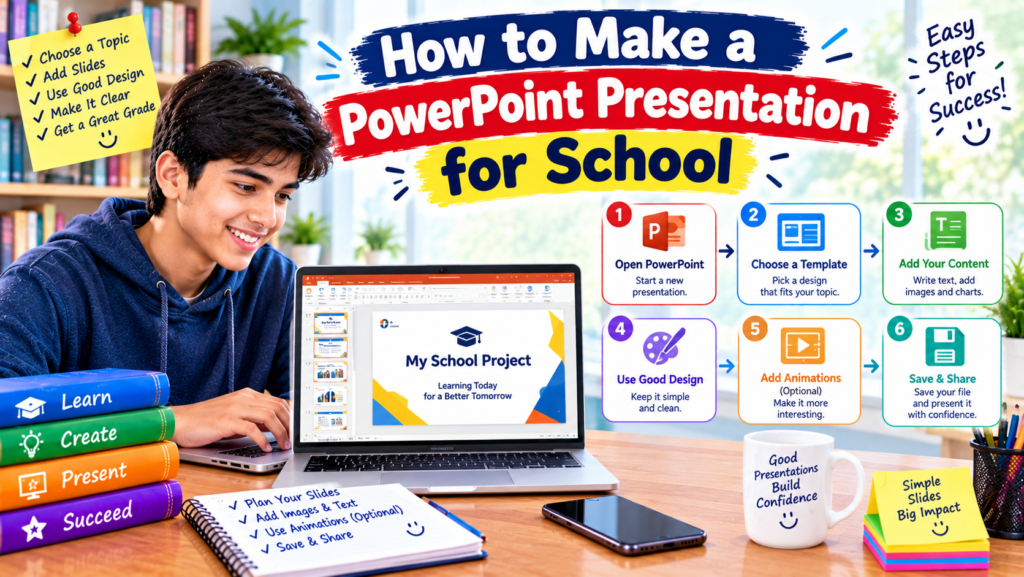
Microsoft PowerPoint is one of the most widely used tools for school presentations. It allows you to create slides containing text, images, charts, shapes, animations, and other visual elements.
Here is how to get started.
- Open Microsoft PowerPoint on your computer.
- Select Blank Presentation to begin from scratch, or choose a template.
- Click the title box on the first slide.
- Enter the name of your project.
- Add your name, class, subject, and teacher’s name if required.
For example, your first slide might contain:
The Solar System
Prepared by: Your Name
Class: Grade 8
Subject: Science
Keep the title slide simple. You can add one relevant image, such as a picture of the planets, if it fits the assignment.
If PowerPoint is not installed on your computer, you can use PowerPoint for the web or Google Slides through a web browser. Availability and features may depend on your account and internet connection.
Step 3: Choose a Clean Presentation Design
After creating your first slide, choose a design that makes your content easy to read.
PowerPoint includes themes that control the overall appearance of your slides, including colors, fonts, and layouts. You can explore these themes through the Design tab.
For school projects, a simple design is usually a safe choice.
Consider these guidelines:
- Use a light background with dark text, or a dark background with light text.
- Choose one or two easy-to-read fonts.
- Keep headings consistent across slides.
- Use a small set of matching colors.
- Leave enough empty space around text and pictures.
Imagine creating a presentation about climate change. A clean white or pale blue background with dark text and a few relevant photographs can make the information easy to follow.
A slide filled with bright colors, decorative fonts, and moving effects may look exciting at first, but it can distract the audience from your message.
Lesson worth remembering: A presentation does not become better simply because it has more design effects. Clear information and readable slides matter much more.
Step 4: Add New Slides and Select the Right Layout
Now it is time to build the main part of your presentation.
In PowerPoint, go to the Home tab and select New Slide. You can choose different layouts depending on what you want to show.
Common slide layouts include:
- Title Slide: For the beginning of your presentation.
- Title and Content: For headings with bullet points.
- Two Content: For comparing two ideas or placing text beside an image.
- Section Header: For introducing a new part of a longer project.
- Blank: For creating your own arrangement.
Choose a layout that suits the information rather than using the same arrangement on every slide.
For example, a history presentation comparing two historical periods might work well with a two-column layout. A science presentation explaining the water cycle might be easier to understand with a diagram and a few short labels.
You can usually change a slide’s layout later, so do not worry if your first choice is not perfect.
Step 5: Write Short, Clear Points Instead of Long Paragraphs
One of the most common presentation mistakes is copying entire paragraphs from a textbook or website onto a slide.
This creates two problems. First, the audience has too much text to read. Second, you may feel tempted to read every word instead of explaining the topic.
Instead, write the main ideas in short bullet points.
For example, imagine you are making a slide about the water cycle.
Too much text:
The water cycle is a continuous process in which water moves between the Earth’s surface and the atmosphere through evaporation, condensation, precipitation, and collection. Heat from the Sun causes water to evaporate, and the water vapor cools to form clouds.
A clearer slide:
How the Water Cycle Works
- The Sun heats water on Earth’s surface.
- Water evaporates and rises as vapor.
- Cooling vapor forms clouds through condensation.
- Water returns to Earth as precipitation.
You can explain the details while speaking to the class.
As a general starting point, try to keep each slide focused on one main idea. Use a few short bullet points instead of filling the entire slide with text. There is no strict word limit that works for every presentation, so adjust the amount of text to suit your audience and assignment.
Step 6: Add Pictures, Diagrams, and Charts
Pictures can make difficult ideas easier to understand. They are especially useful for subjects such as science, geography, biology, history, and computer studies.
To insert a picture in PowerPoint:
- Open the slide where you want the picture.
- Select the Insert tab.
- Choose Pictures.
- Select an image from your computer or use an available online image option.
- Resize and position the image so it does not cover important text.
You can also add shapes, SmartArt diagrams, or charts when they help explain your topic.
For example:
- A solar system presentation can use a labeled diagram of the planets.
- A geography project can include a map.
- A mathematics presentation can use a graph to explain numerical data.
- A computer studies assignment can include screenshots showing software steps.
Make sure every image has a purpose. Adding random pictures simply to fill empty space can make your presentation less focused.
Where Can You Find Pictures for School Presentations?
You can look for images through educational resources, public-domain collections, and websites that provide images under suitable licenses.
Before using a picture, check its license and any attribution requirements. An image appearing in Google Images is not automatically free to reuse.
You can also create your own diagrams using PowerPoint shapes. This is often a good option for explaining processes, labeling parts, or illustrating simple concepts.
Step 7: Use Fonts and Colors That Are Easy to Read
Your slides might look excellent on your laptop but become difficult to read when projected onto a classroom screen.
To avoid this, use fonts and colors carefully.
A few useful design tips:
- Use a readable font such as Arial, Aptos, or Calibri.
- Make slide headings noticeably larger than the body text.
- Choose text sizes that remain readable from the back of the classroom.
- Avoid placing light-colored text over a busy photograph.
- Keep text alignment consistent.
- Use bold formatting to emphasize important words, not entire paragraphs.
For many classroom presentations, headings around 28–36 points and body text around 20–28 points can be a useful starting point. You may need larger text for a big classroom or a smaller screen.
Before finishing, review your slides in presentation mode. If you have to lean toward the laptop to read the content, your classmates may struggle to read it from a distance.
Step 8: Add Transitions and Animations Carefully
PowerPoint provides transitions between slides and animations for individual objects.
Transitions control how one slide changes to the next. Animations control how text, pictures, and other objects appear or move.
To add a transition:
- Select the slide.
- Open the Transitions tab.
- Choose a simple effect.
- Preview it to see how it looks.
To animate an object, select the object and open the Animations tab.
For a school assignment, simple effects such as Fade are often enough. You do not need a different transition for every slide.
Think about what the effect accomplishes. An animation might help reveal the steps in a scientific process one at a time. However, an effect that spins every heading across the screen can distract your audience.
If you are unsure, keep animations minimal. A clean presentation is usually easier to deliver confidently.
Step 9: Save Your PowerPoint Presentation
Saving your work is important, especially when you have spent time researching and designing your slides.
To save your presentation in Microsoft PowerPoint:
- Select File.
- Choose Save As.
- Select a folder where you can find the file easily.
- Enter a clear filename, such as
Solar_System_School_Project. - Make sure the file type is PowerPoint Presentation (
.pptx). - Click Save.
If you use PowerPoint with cloud storage or Google Slides, your work may save automatically when you are signed in and connected. However, check that the latest changes have been saved before closing the browser or app.
For extra protection, keep a backup copy in a second location, such as a USB drive or a trusted cloud storage service.
Should You Save It as PPTX or PDF?
The correct format depends on what your teacher requests.
- PPTX: Best when you need to present slides and retain editable content, transitions, and animations.
- PDF: Useful when your teacher wants a document that is easy to open or print. Animations and interactive presentation features will not work as they do in PowerPoint.
If your teacher specifically asks for a PowerPoint file, submit the .pptx version rather than assuming a PDF will be accepted.
Step 10: Practice Your Presentation Before Class
Finishing the slides is only part of the assignment. You also need to prepare what you will say.
Open your presentation in Slide Show mode and move through the slides as if you were presenting to your classmates.
For each slide, try to explain the main idea in your own words.
For example, when presenting the water cycle, you could explain why the Sun causes evaporation and how water eventually returns to the ground as rain.
You do not need to memorize every sentence. Understanding the main points will help you speak more naturally.
Here are a few ways to practise:
- Read through the slides once to check the order of information.
- Explain the topic aloud without reading every bullet point.
- Use Presenter View or speaker notes if available and helpful.
- Check the pronunciation of unfamiliar terms.
- Time your presentation if your teacher has set a limit.
- Practise answering one or two likely questions.
A useful trick is to ask yourself, “If someone asked me what this slide means, could I explain it without reading the screen?” If the answer is yes, you are making good progress.
Best Free Tools for Making a School Presentation
Microsoft PowerPoint is not your only option. Depending on your device, internet access, and assignment requirements, another tool might suit you better.
1. Microsoft PowerPoint
PowerPoint is a strong choice when you want detailed control over slide layouts, diagrams, animations, and formatting.
It is especially useful if your school already uses PowerPoint or requires a .pptx file. Desktop features and licensing vary, so check whether your version requires a paid Microsoft 365 subscription.
Website: Microsoft PowerPoint
2. Google Slides
Google Slides runs in a web browser and supports collaborative editing. It is useful when several students are working on the same project.
For example, one group member can research the introduction while another prepares the main content. The group can then review the presentation together.
You generally need a Google account to create and manage presentations, and internet access is helpful for working online. Check the available offline options if you expect to work without a connection.
Website: Google Slides
3. Canva
Canva offers presentation templates that can help you create visually appealing slides without designing everything from scratch.
It is useful for projects that need illustrations, photographs, or a more visual style. Some templates, elements, and features require a paid plan, so look for items marked as free.
Website: Canva
4. PowerPoint on a Smartphone
If you do not have a laptop, you can create or edit presentations using the PowerPoint mobile app, subject to the features available for your device and account.
A smartphone is useful for making simple slides, editing text, and checking your work. However, arranging detailed layouts can be more difficult on a small screen.
If possible, review the presentation on a larger screen before presenting it in class.
Common Mistakes to Avoid in a School PowerPoint Presentation
Even a presentation with good information can become confusing if the slides are poorly organized.
Watch out for these common mistakes.
Putting Too Much Information on One Slide
A slide filled with long paragraphs is difficult to read while listening to a speaker. Divide the information into smaller sections and explain the details aloud.
Using Too Many Colors
Bright colors can be useful for highlighting important points, but too many competing colors can make the presentation look messy. Choose a small, consistent palette.
Adding Unnecessary Animations
Animations should support your explanation rather than become the main attraction. Use them only when they serve a clear purpose.
Using Low-Quality or Unrelated Images
A blurry image may look acceptable on a small screen but appear poor when projected. Choose clear images that directly relate to the topic.
Forgetting to Check Spelling
Small spelling mistakes can make a school project look unfinished. Read each slide carefully and use the spelling checker as an extra step.
Copying Information Without Understanding It
Do not include complicated facts simply because they sound impressive. Make sure you understand the information well enough to explain it in your own words, and provide references when required.
Leaving Everything Until the Last Minute
Creating slides, checking facts, fixing layouts, and practising can take longer than expected. Start early enough to review your presentation before the deadline.
Not Testing the Presentation File
A file may open differently on another computer if fonts, media, or formatting are not supported. If possible, test the file on the device you will use in class, and keep a PDF backup if your teacher allows one.
Example: A Simple Five-Slide School Presentation
Suppose your teacher asks you to give a short presentation about pollution. Here is one way to organize it.
Slide 1: Title
Pollution: Causes, Effects, and Solutions
Your name and class
Slide 2: What Is Pollution?
- Pollution occurs when harmful substances affect the environment.
- It can affect air, water, and land.
- It can harm people, animals, and plants.
Slide 3: Main Causes
- Vehicle and industrial emissions
- Improper waste disposal
- Plastic waste
- Certain agricultural and industrial activities
Slide 4: Possible Solutions
- Reduce unnecessary waste.
- Reuse and recycle suitable materials.
- Use public transport when practical.
- Dispose of rubbish responsibly.
Slide 5: Final Message and References
Explain why reducing pollution matters, then list the sources you used for your facts and images.
This simple structure gives the audience a clear path from understanding the problem to learning about possible solutions.
Frequently Asked Questions
1. Can I make a PowerPoint presentation for free?
Yes. You can use free options such as Google Slides, PowerPoint for the web, and Canva’s free features. Some advanced tools, templates, and features may require payment.
2. How many slides should a school presentation have?
There is no single correct number. A short assignment might need five slides, while a longer project may need ten or more. Follow your teacher’s instructions and make sure each slide contributes useful information.
3. Can I make a PowerPoint presentation on my phone?
Yes. Presentation apps are available for smartphones. You can create slides, add text and images, and edit existing presentations. A laptop or larger screen may make detailed formatting easier.
4. How can I make my presentation look professional?
Use a consistent theme, readable fonts, short bullet points, relevant images, and clear headings. Keep animations simple and check that the slides are easy to read from a distance.
5. Can I convert a PowerPoint presentation into a PDF?
Yes. PowerPoint provides export or save options for PDF, and other presentation tools may offer similar features. A PDF is useful for sharing or printing, but it does not preserve PowerPoint animations as working presentation effects.
6. Should I include references in my school presentation?
Yes, when your teacher requires them, and whenever you use information, statistics, or images that need attribution. A final references slide is a simple way to list your sources.
7. What should I do if the presentation does not open at school?
Save the presentation in the requested format, test it before class if possible, and keep a backup copy. If your teacher permits it, a PDF version can provide a useful fallback for viewing the slides.
Final Thoughts
Making a PowerPoint presentation for school becomes much easier when you divide the task into manageable steps. Start by planning your content, choose a simple design, add clear text and relevant visuals, and save your work in the correct format.
Most importantly, remember that the slides are there to support your explanation. You do not need complicated effects or expensive software to share useful information with your class.
Take time to practise, check your facts, and review the presentation before submitting it. With a little preparation, you can create slides that are clear, organized, and easy for your teacher and classmates to follow.